Contact Form 7
Contact Forms
Out themes employ Contact Form 7 for forms and come with ready-to-use layouts that can be directly imported or copied from the documentation. Before inserting a form, ensure that you have either imported or created the forms you require.
Creating Forms
Step 1: Locate Form Data
Once you have downloaded all files from ThemeForst, ensure to uzip the folder and locate the demo-content/theme-demo-content.xml file.

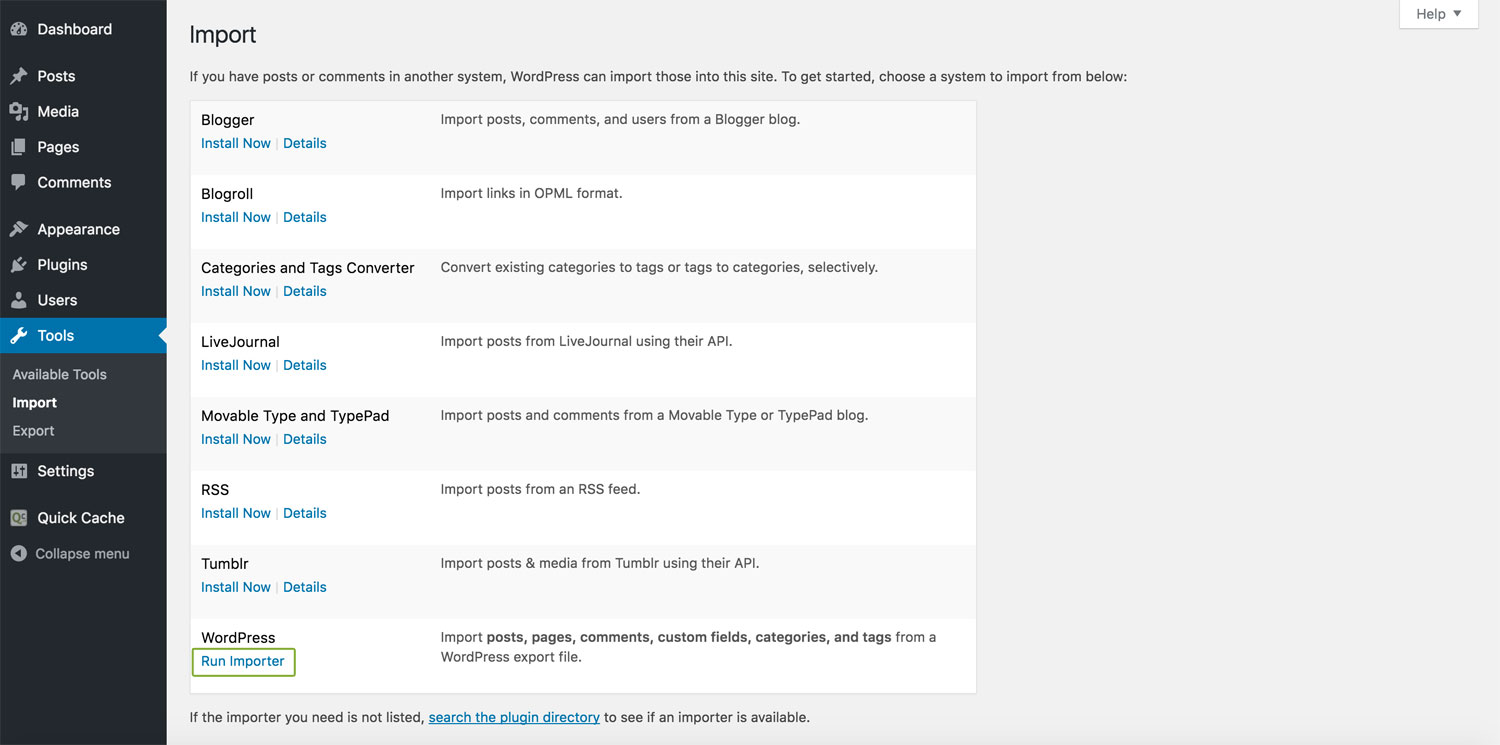
Step 2: Go to Importer
Once you have located the form XML file, log into your WordPress website and go to Tools > Import and click on "Run Importer", for example:
Step 3: Form Data
Note: If you have not previously installed the Importer, you will be prompted to install the WordPress Importer at this stage. Follow the install instructions and after you activate it return to the screen shown below.
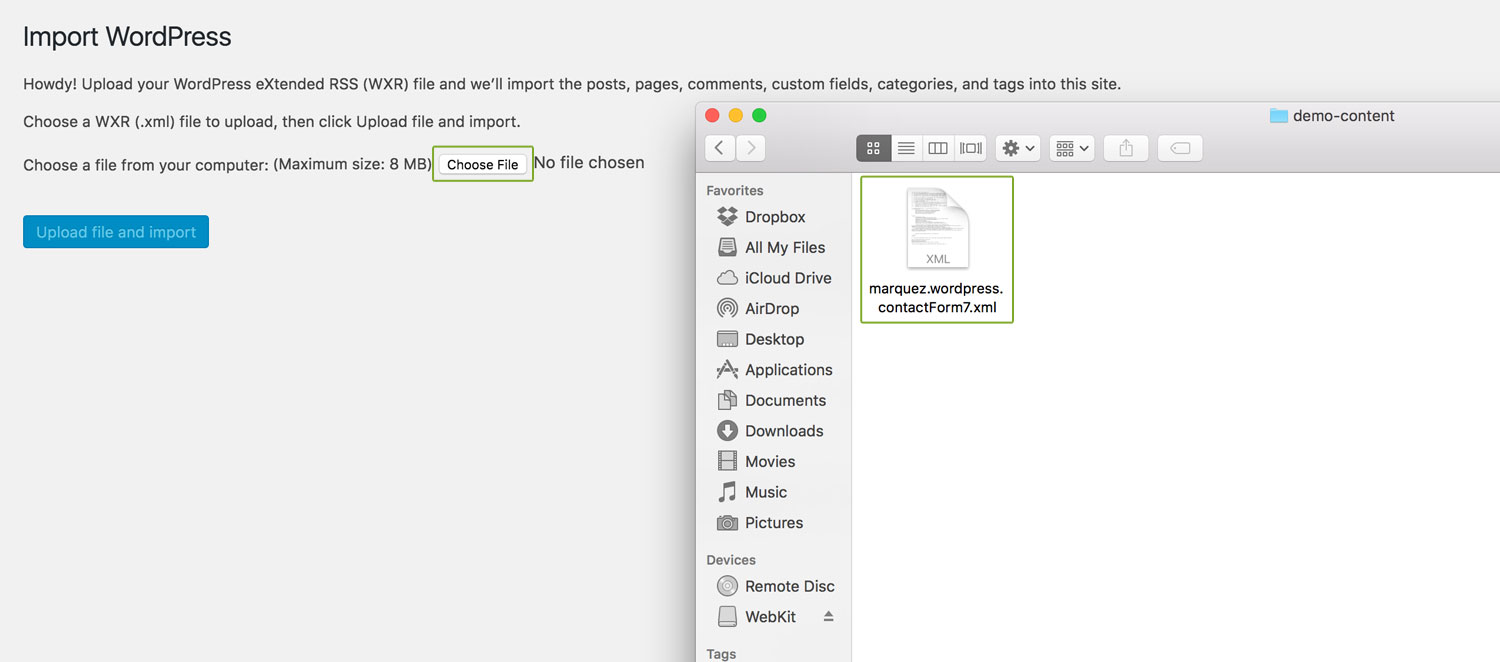
Click the "Choose File" button and browse to Download_v.1.0.X > Form_structure/themename.wordpress.contactForm7.xml, select it, and click "Open", for example:
Once you have selected the XML file, the importer will give you the option to either import the content as ThemeMountain, or assign all imported content (i.e. posts) to an existing user of your WordPress site. We recommend you assign it to your own or another existing user account.
Click the Submit to import the form data. Once complete you should see a successful import message. Once completed you can move on and insert the form of your choice using Visual Composter. Scroll down to see how.
-
Insert Form Data Directly
If you prefer not to import all form data because you require only a particular form, you can simply copy the one require from below. To insert the markup go Contact > Add New and paste the markup. Then hit save and you're ready to insert it using Visual Composer.
-
Contains:
- Name
- Telephone
- Subject
- Project Budget
- Message
[text* fullname placeholder "Name"][email* email placeholder "Email"][tel telephone placeholder "Telephone"][text* subject placeholder "Subject"][select* select-project-budget first_as_label class:select "Project Budget" "$1000" "$2000" "$3000+"][textarea* message placeholder "Message"][submit "Send"]
-
Contains:
- Name
- Telephone
- Subject
- Project Budget
- Radio Buttons
- File Upload
- Checkboxes
- Message
[text* fullname placeholder "Name"][email* email placeholder "Email"][tel telephone placeholder "Telephone"][text* subject placeholder "Subject"][select* select-project-budget first_as_label class:select "Project Budget" "$1000" "$2000" "$3000+"][radio radio-site default:1 "I need a new site" "I need my site reworked"]Attach Project Artwork [file file-artwork limit:1mb filetypes:pdf|gif|png|jpg|jpeg][textarea* message placeholder "Message"]Subscribe to our newsletter? [checkbox* newsletter "Yes, I want to subscribe"] [submit "Send"]
-
Contains:
- Name
- Telephone
- Subject
- Project Budget
- Radio Buttons
- File Upload
- Message
- Accept Validation
[text* fullname placeholder "Name"][email* email placeholder "Email"][tel telephone placeholder "Telephone"][text* subject placeholder "Subject"][select* select-company-position class:select "Position" "Design" "Lead Developer" "Junior Developer" "Social Account Manager"][select* select-previous-experience class:select "Experience" "2 years" "3 years" "5+ years"][radio radio-freelance default:1 "I have done freelance work" "I have not done freelance work"]Attach your CV [file* file-cv limit:1mb filetypes:pdf]Attach a picture of yourself [file* file-profile limit:1mb filetypes:gif|png|jpg|jpeg][textarea* message placeholder "Tell us a bit about yourself..."][acceptance accept-this]I accept the terms relating to this submission.View Terms[submit "Send"]
-
Inserting a Form
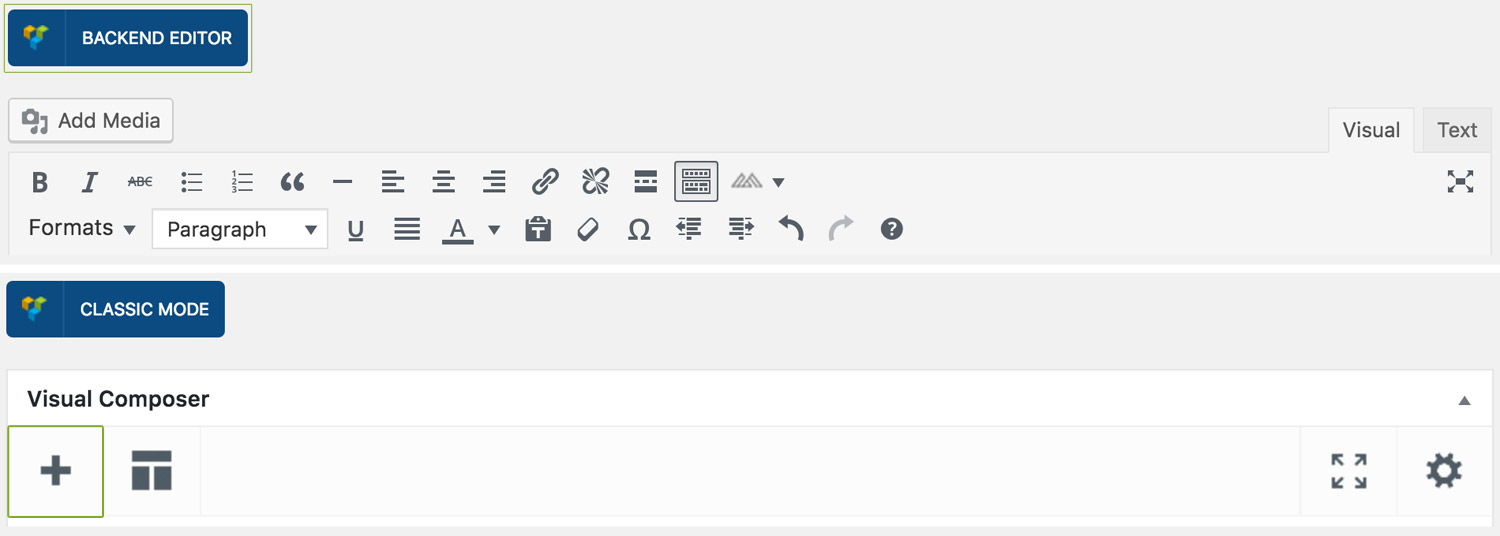
Step 1: Switch To Backend Editor
To insert a Contact Form, start by clicking the button "Backend Editor" button then click the "+"(Add Element) button, for example:
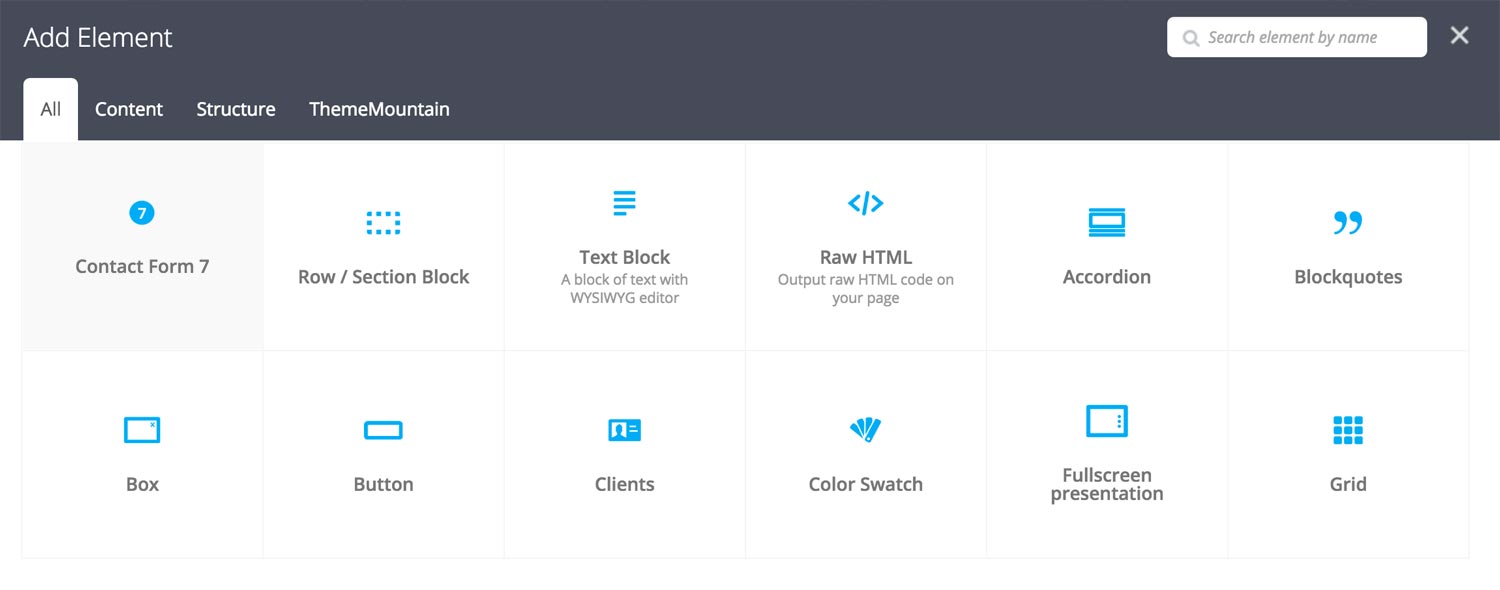
Step 2: Select Feature Columns
Click "Contact Form 7" in the Visual Composer Modal to insert a contact Form, for example:
Step 3: Set Contact Form
Once the Contact Forme element has been inserted click the Edit Link(pen icon) of the Contact Form wrapper, for example:

Here is an overview of available Contact Form options:
-
Select Contact Form
Choose the contact that you want to display.
Can't find what you're looking for? Submit a request in our forum.