Theme Widget Areas
Our theme comes with two widget areas, namely the footer and sidebar.
Related Video Tutorials
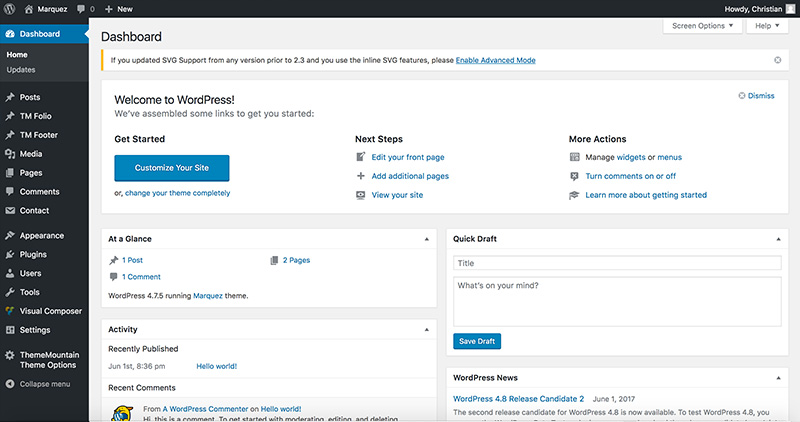
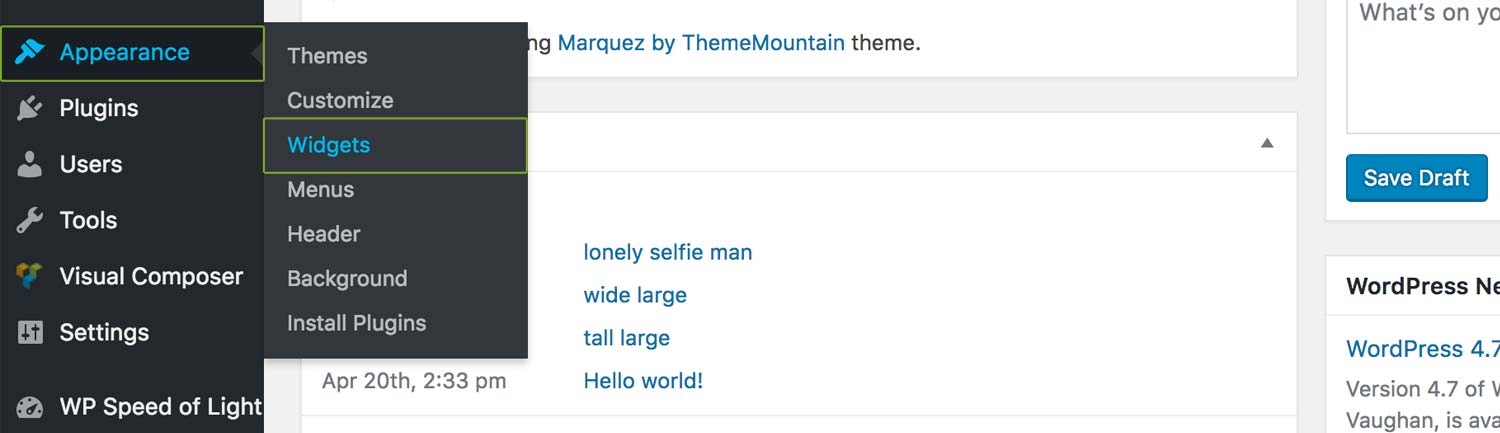
To access the widget areas, navigate to Appearance > Widgets, for example:
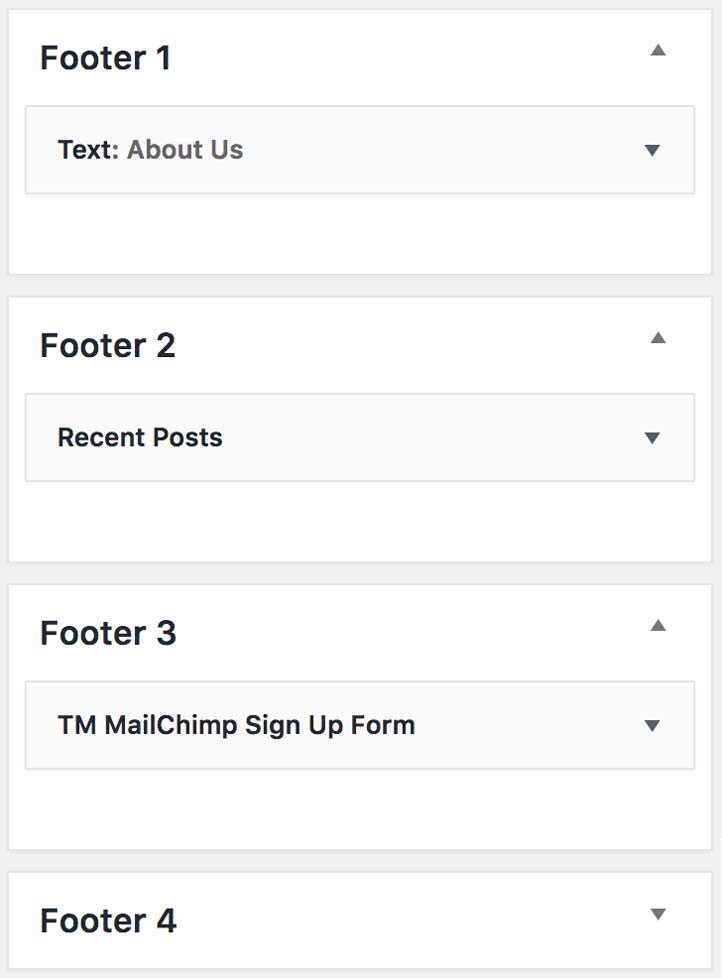
Footer Widget Areas
Our themes support max four footer columns, and therefore four footer widget areas. More than one widget can be added to each widget area.
Note: The number of footer columns that appear in the footer can be set under Appearance > Footer Settings > Footer Columns. If the footer is set to have say 2 or 3 columns only, then add widgets to the first two or three widget areas only.
Default footer widgets used:
- Text widget
- Recent posts widget
- Subscribe widget
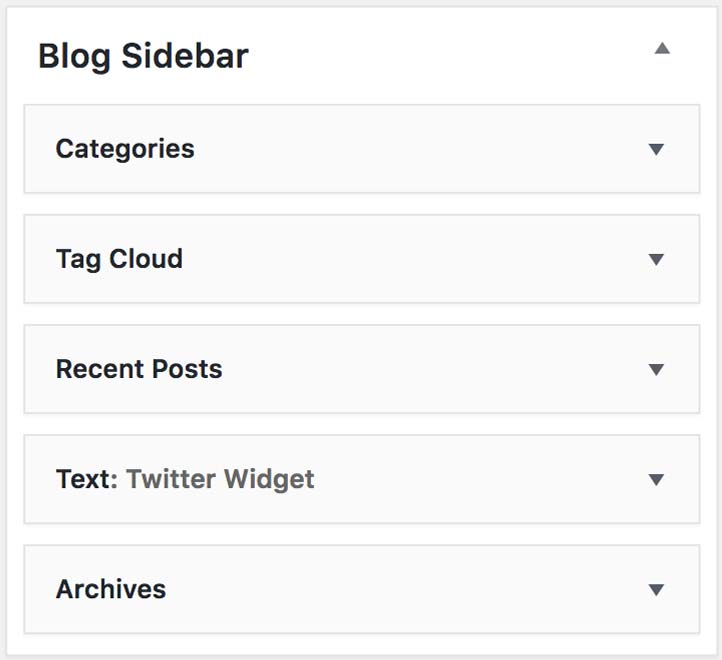
Sidebar Widget Areas
Our themes come with one sidebar dedicated to the blog index with sidebar layout and the single post layout. More than one widget can be added to each widget area.
Default sidebar widgets used:
- Categories
- Tags
- Recent Posts
- Twitter Timeline Widget
Widget Area Plugins
Our themes support all standard WordPress widgets. It also comes with our own MailChimp newsletter subscribe plugin and employs the standard Twitter Timeline Widget. Both can be added to the sidebar and/or the footer as a widget. Here is an overview of the requirements for these widgets and how to add them to designated widget areas.
-
Requirements
Get Your API Key
Follow the steps below to find your API key:
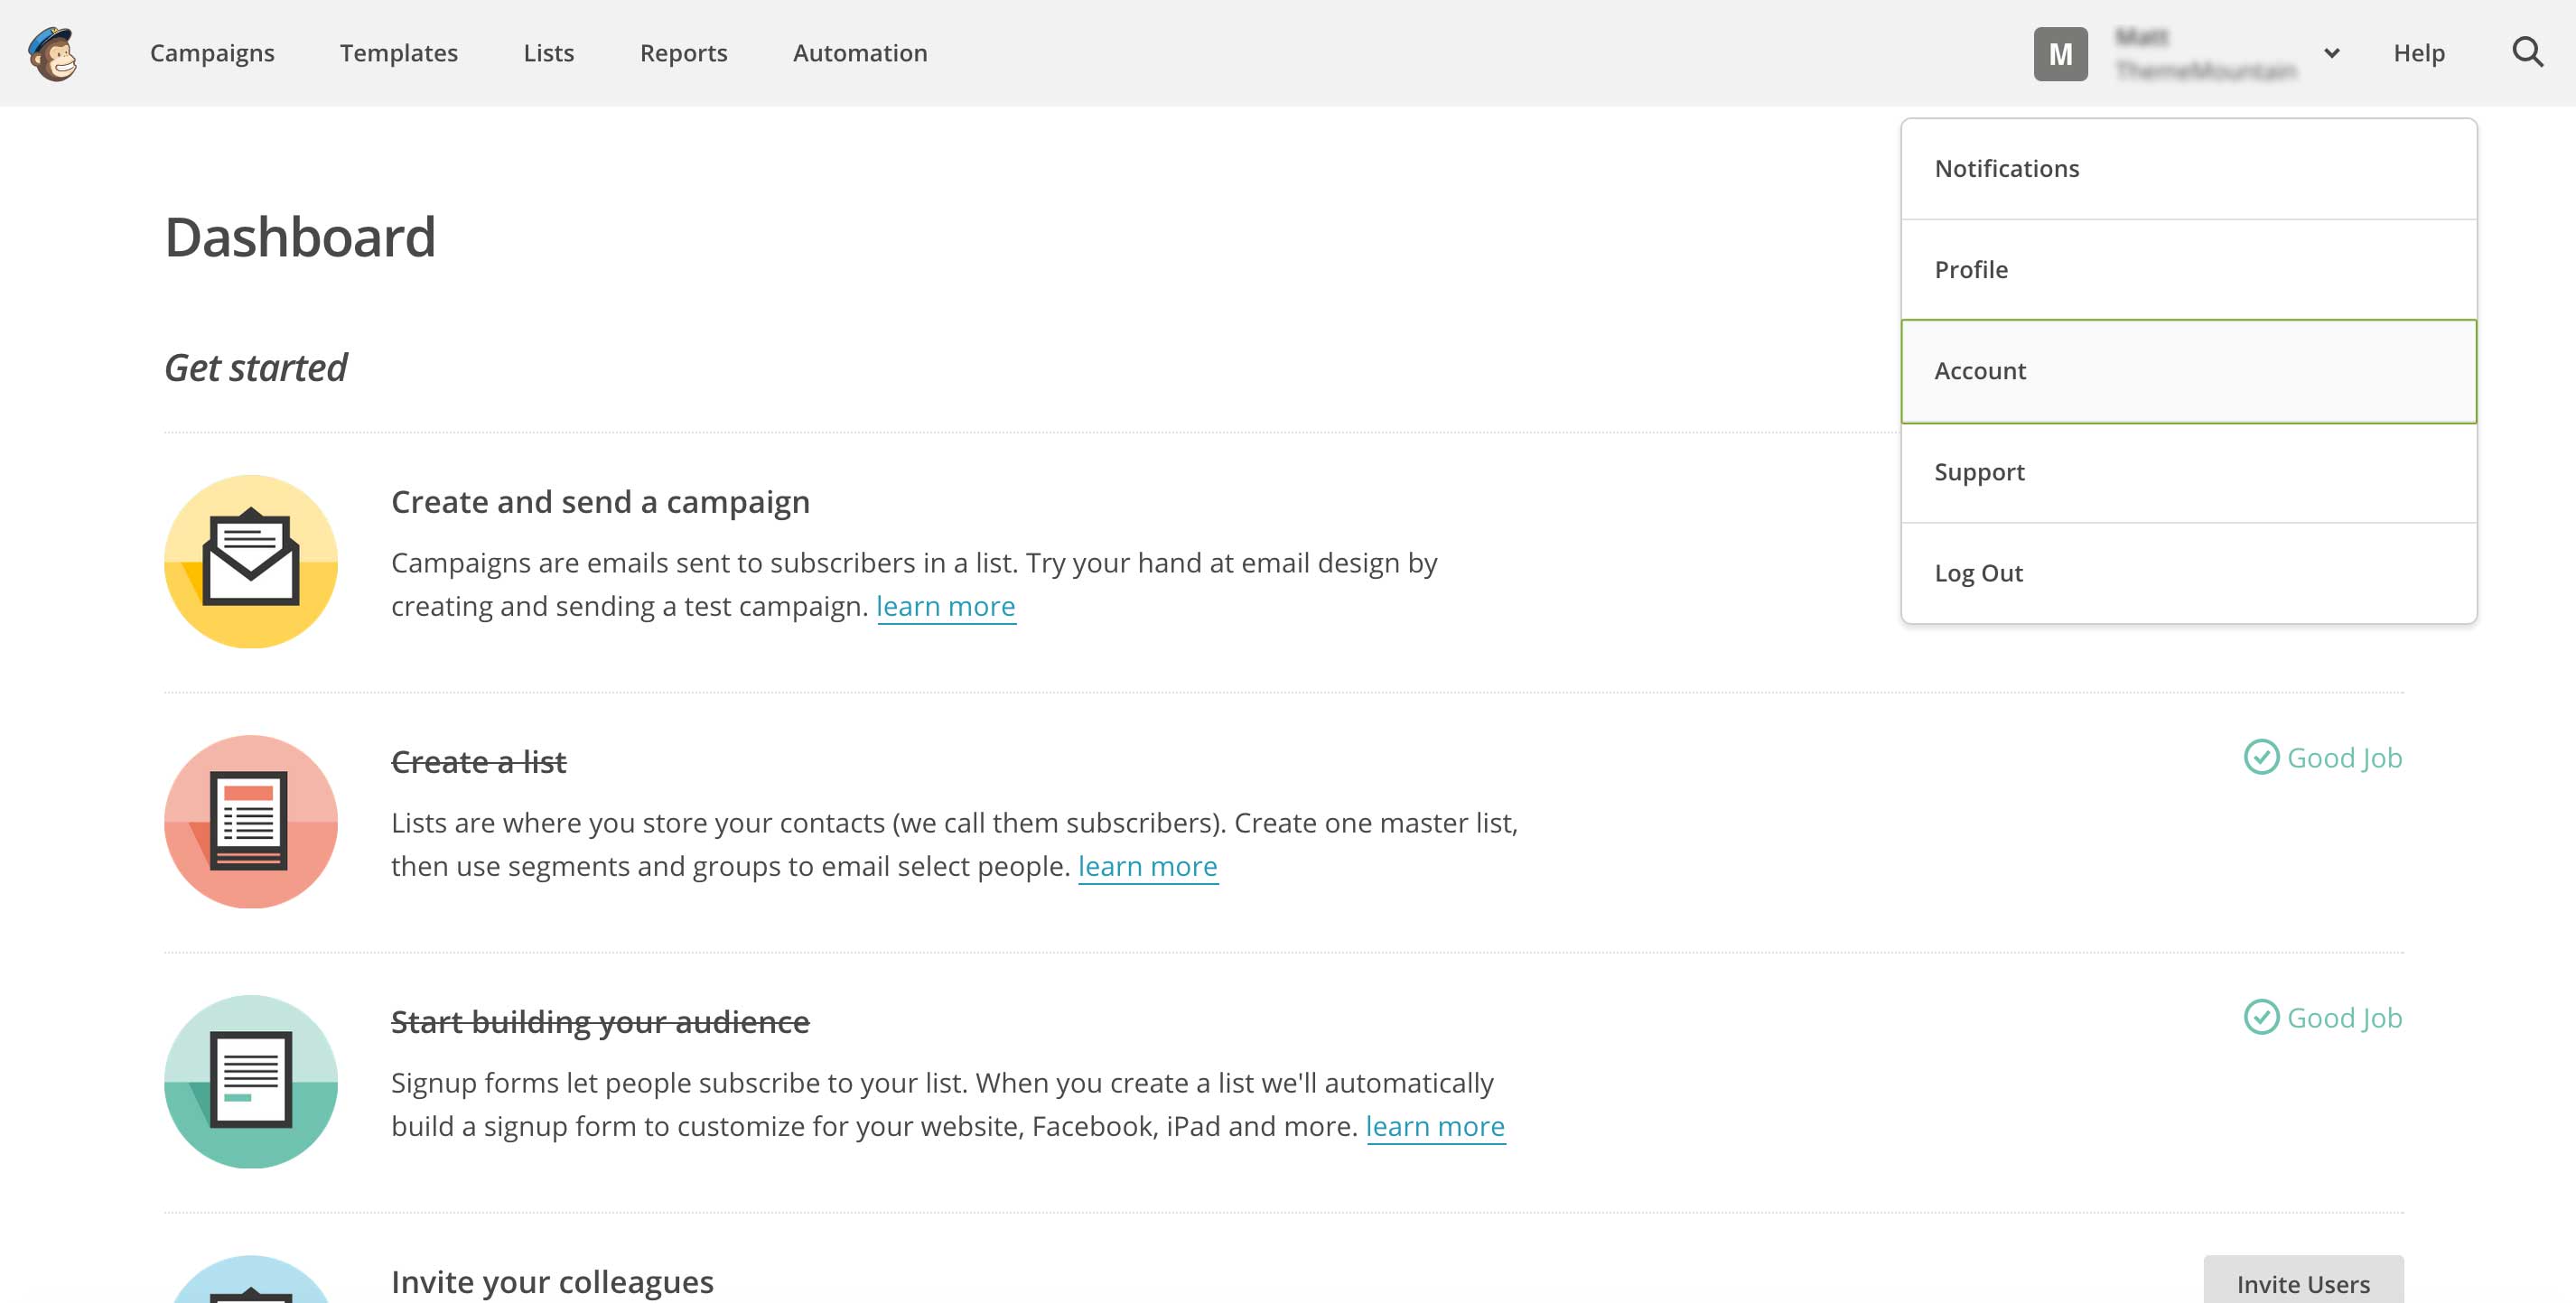
Step 1.
Once logged into your account click on your username in the top right hand corner and select "Account".
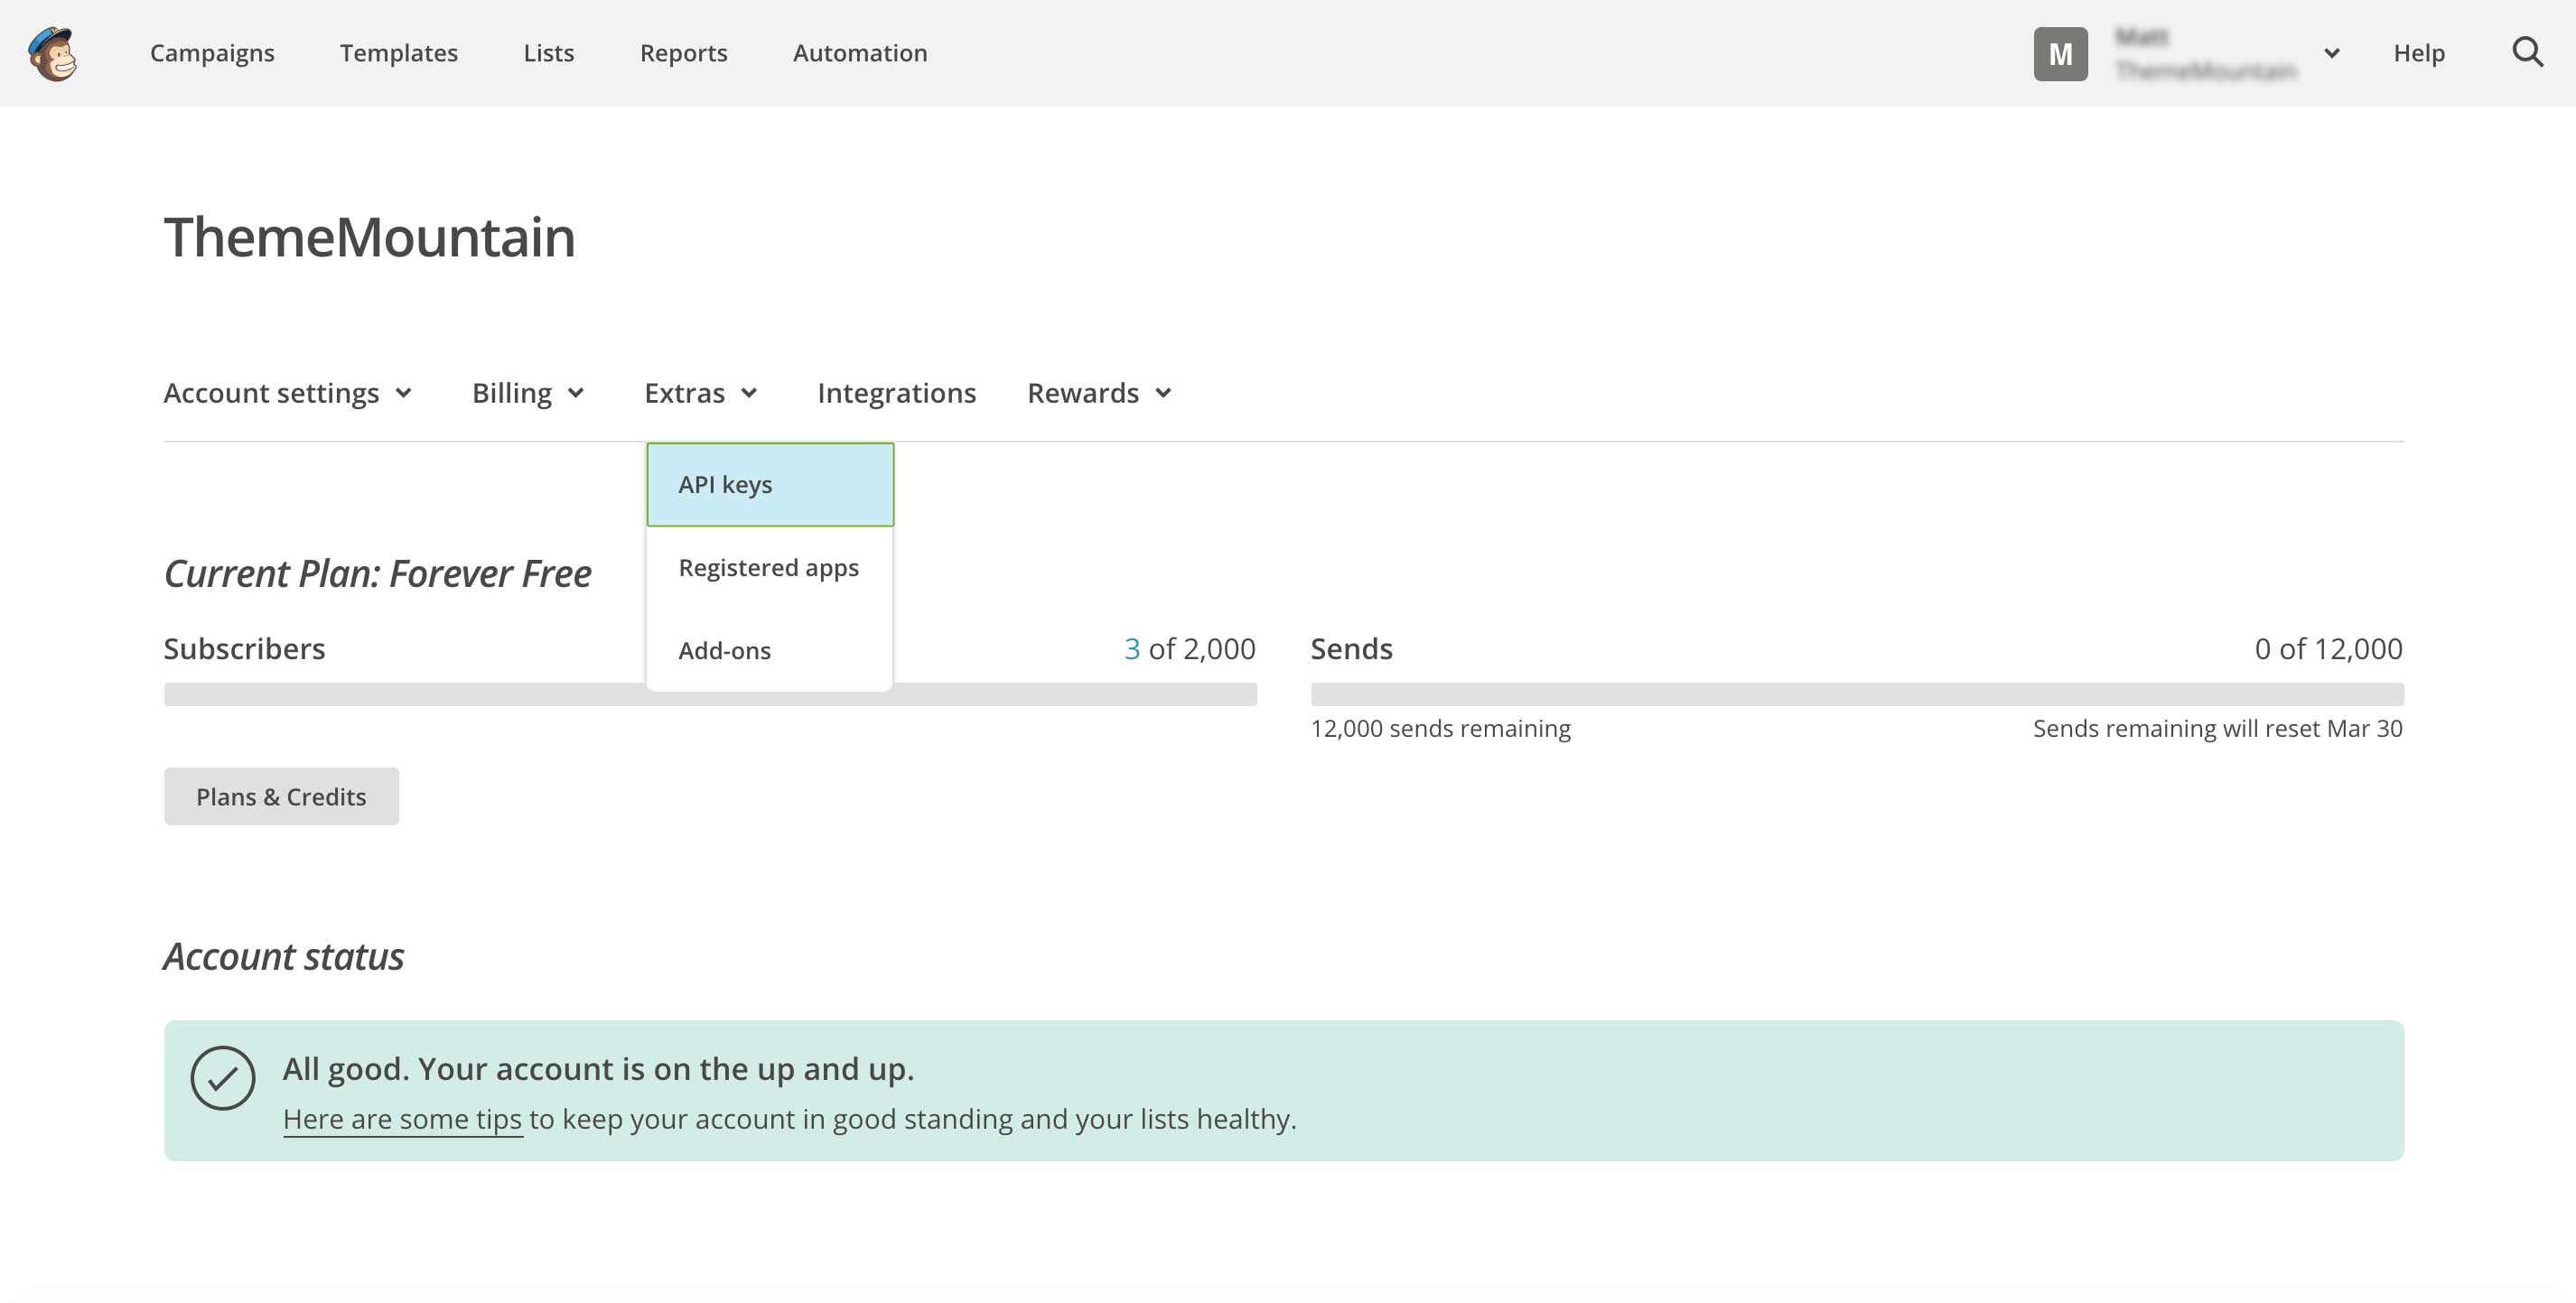
Step 2.
Click on "Extras > API keys".
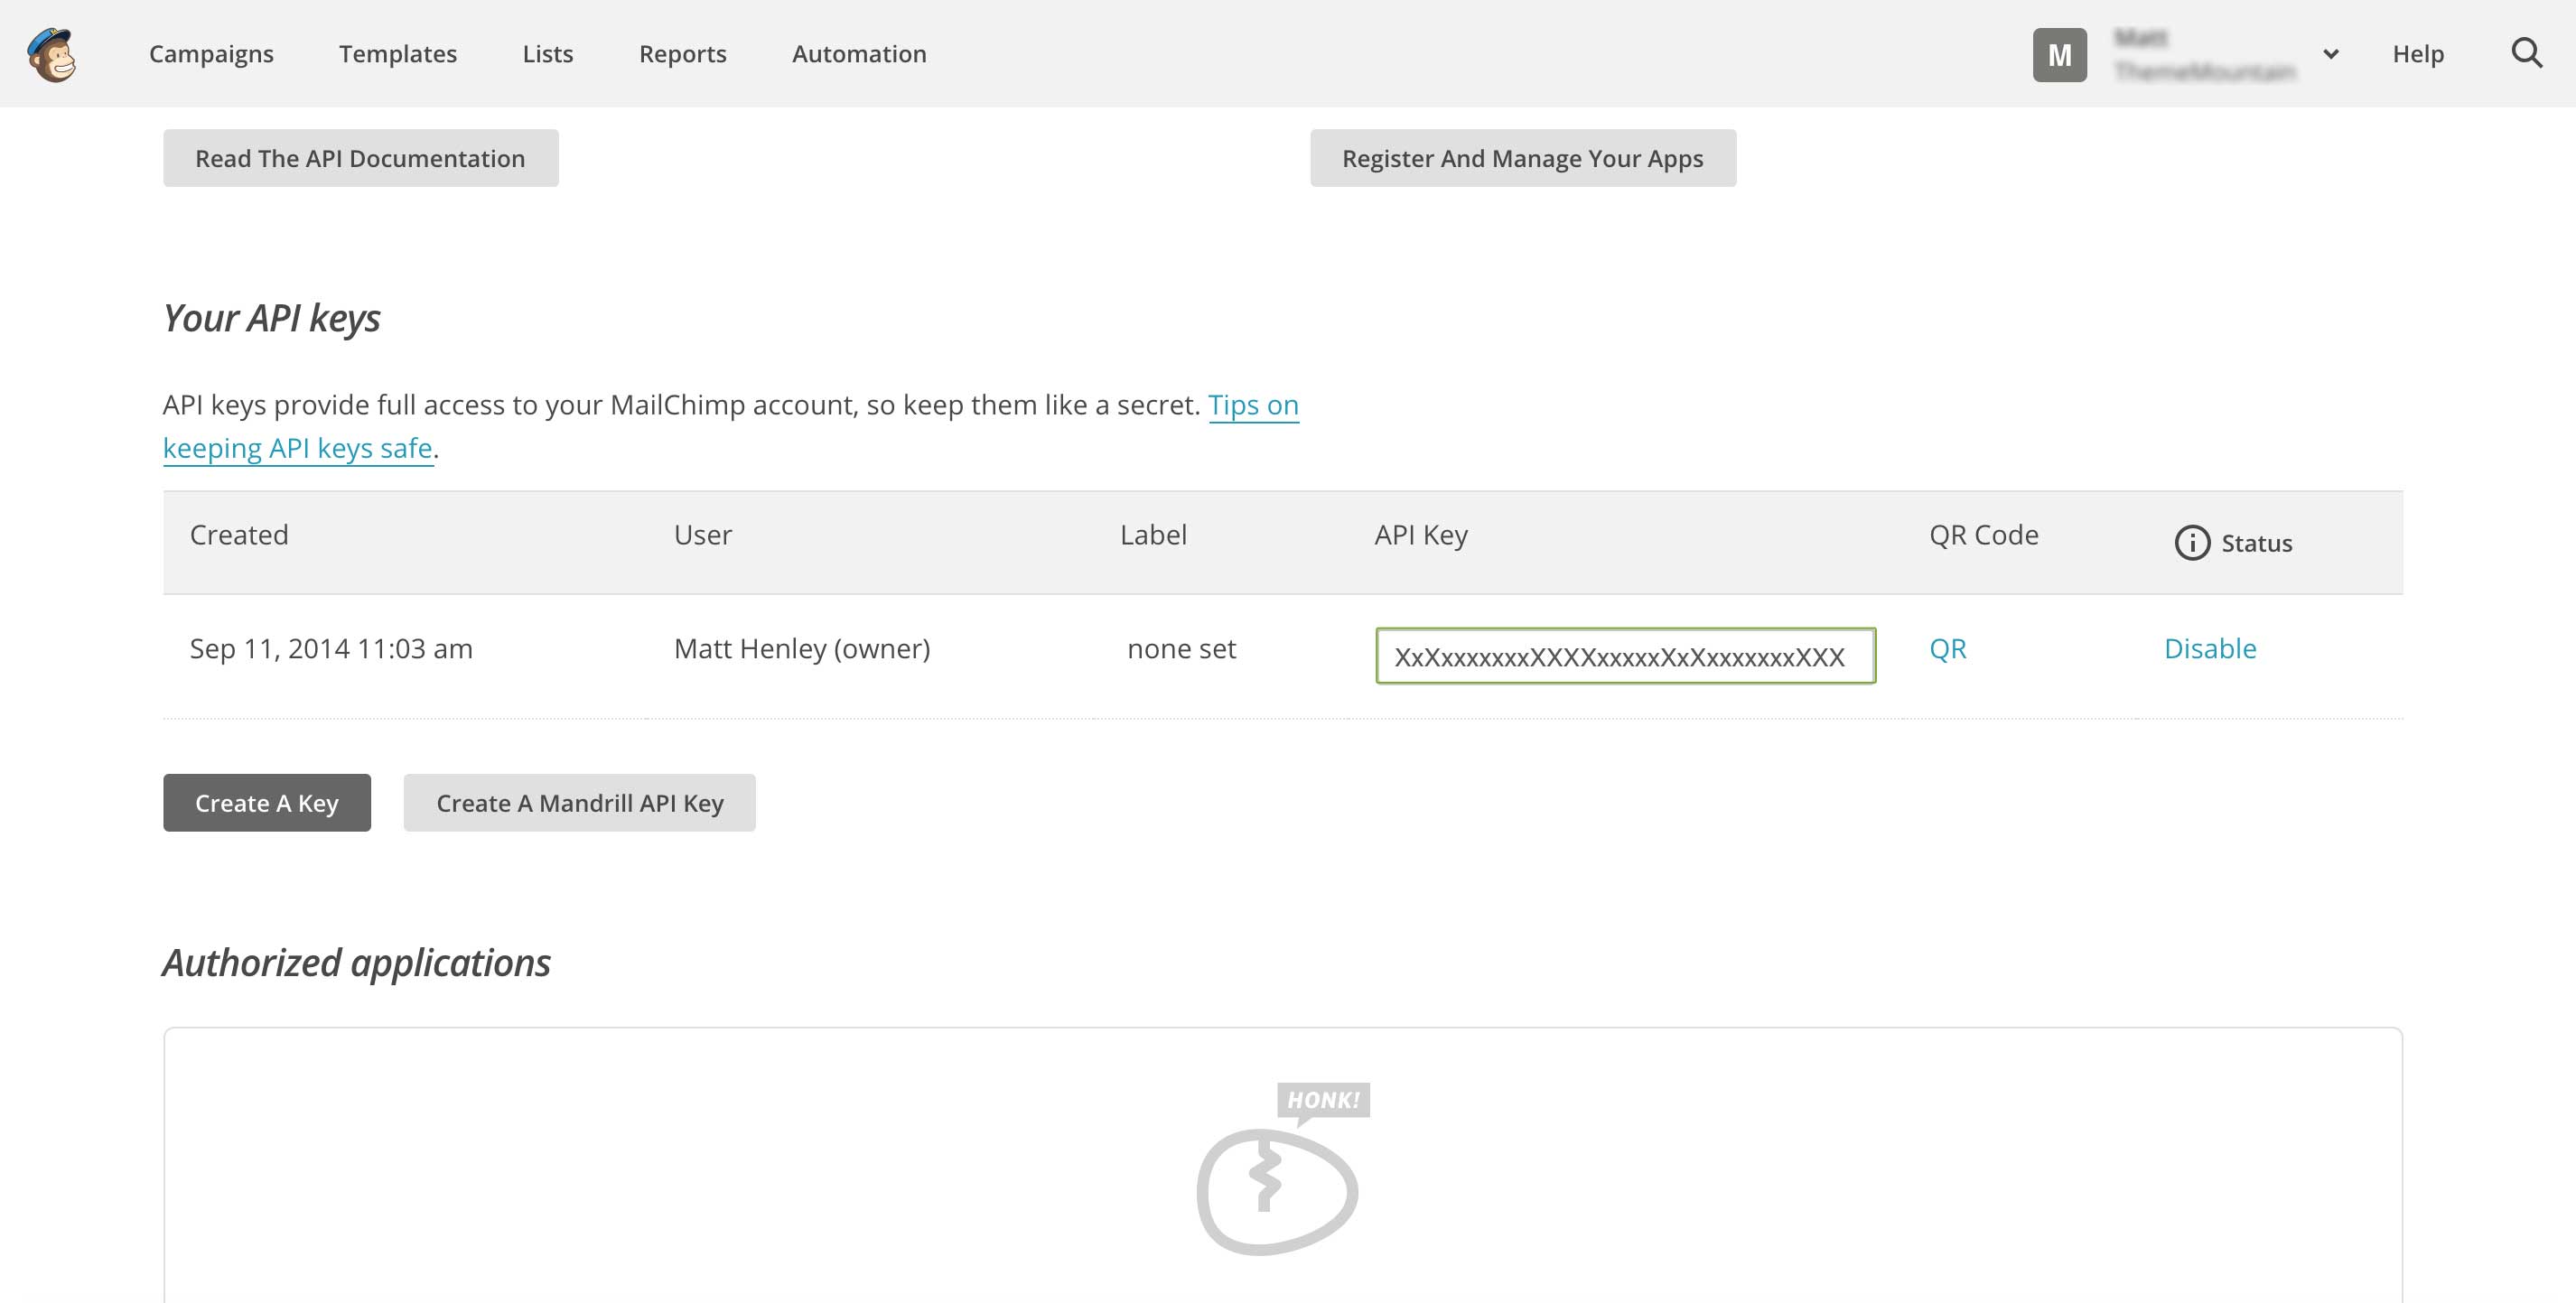
Step 3.
If you see no API key generated click the button "Create A Key". Once generated copy the API key.
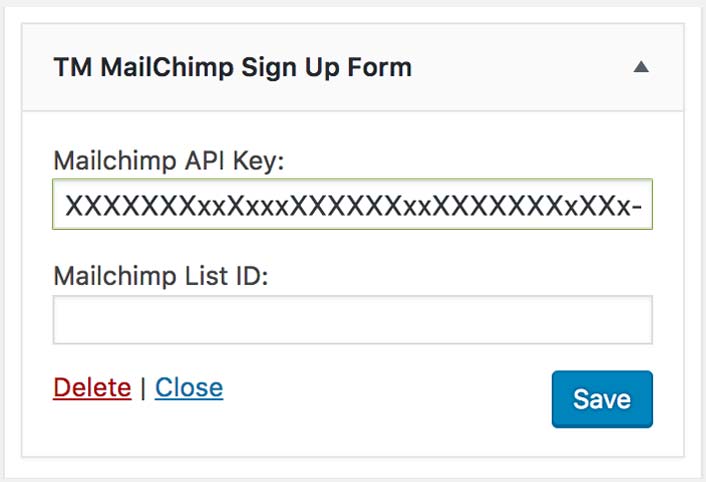
Step 4.
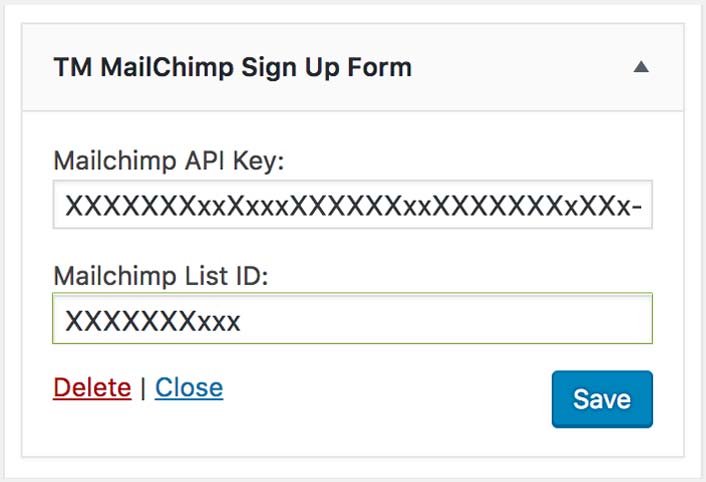
Paste the API key into the designated textfield in the TM Newsletter Subscribe Widget.
Get Your List ID
Follow the steps below to find your List ID:
Step 1.
Once logged into your account click lists and click the button "Create List" if you don't already have a list that you have created and want to use.
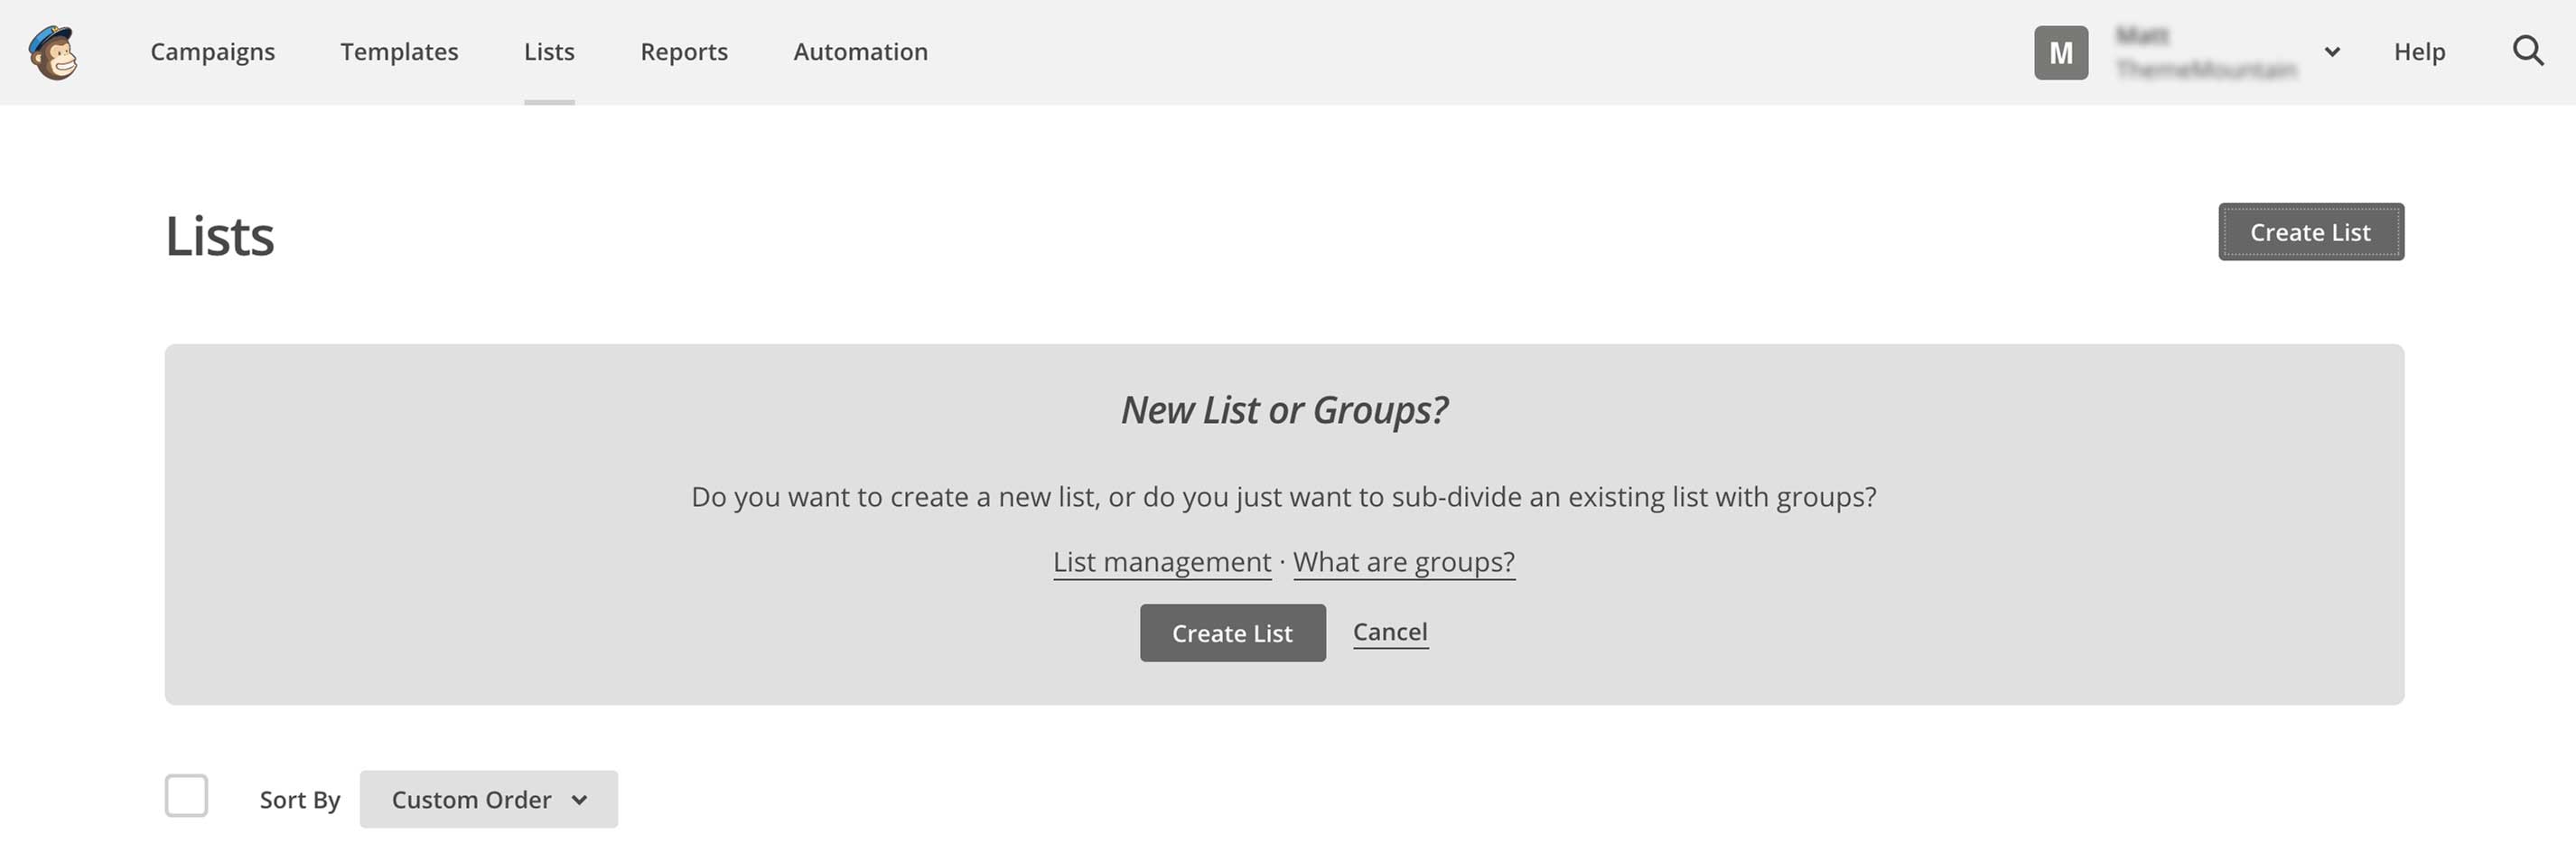
Step 2.
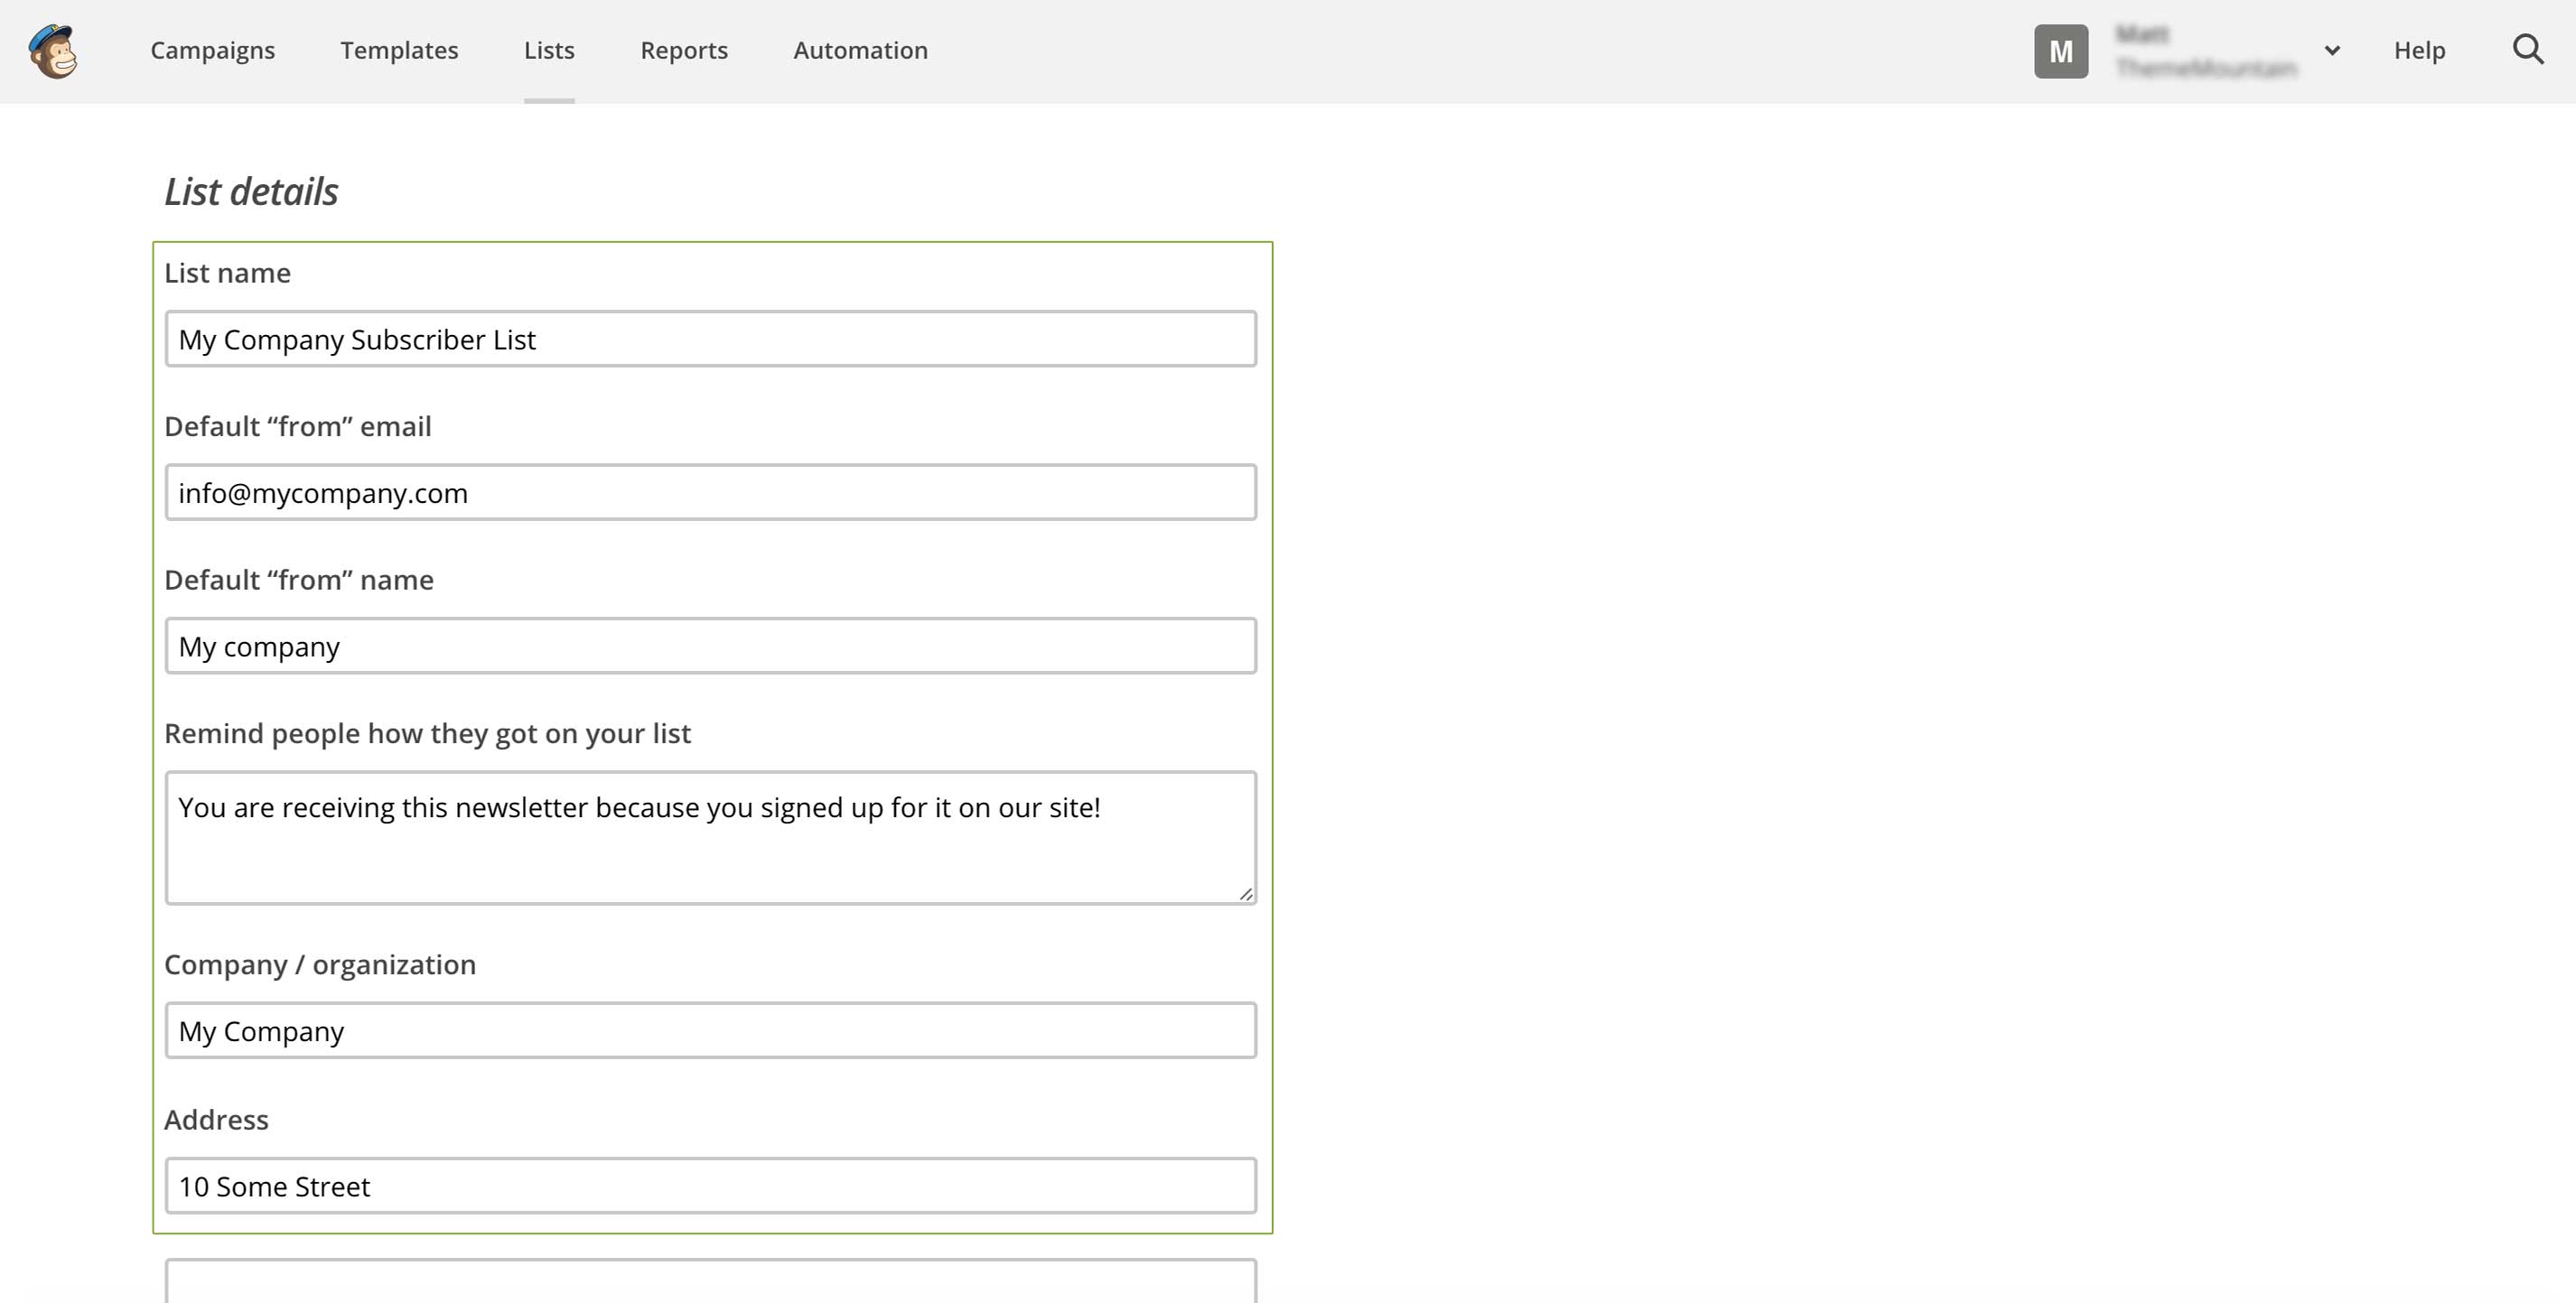
Crefully fill out all your list details and remember to clearly state how how your users have signed up for the list.
Step 3.
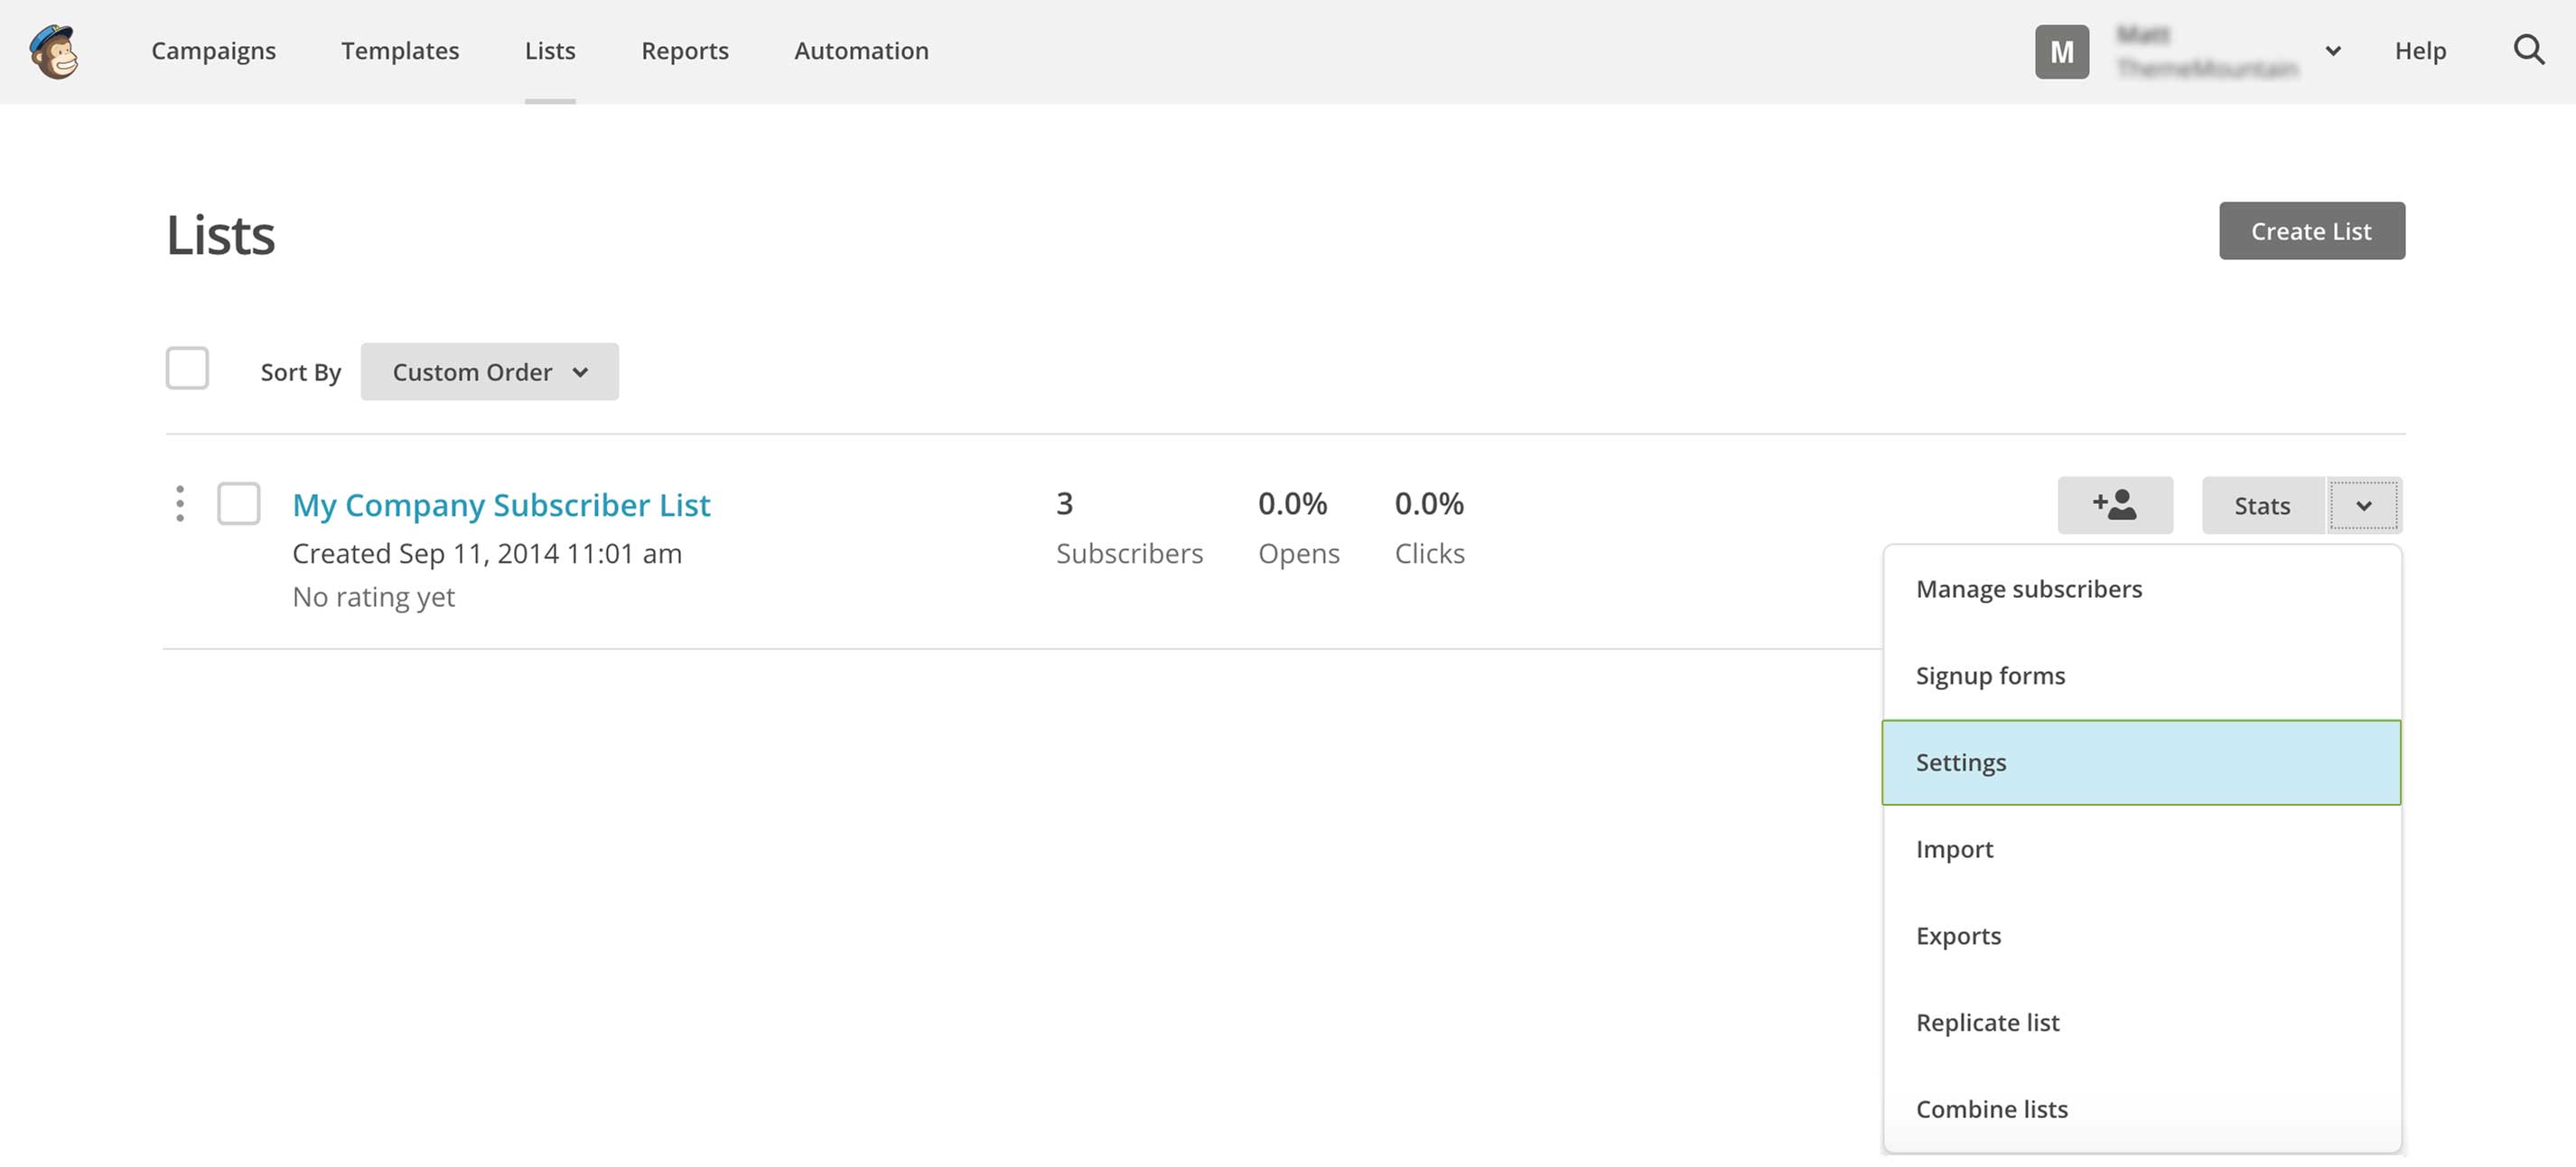
Once created, click the arrow next to the "Stats" button and select "Settings".
Step 4.
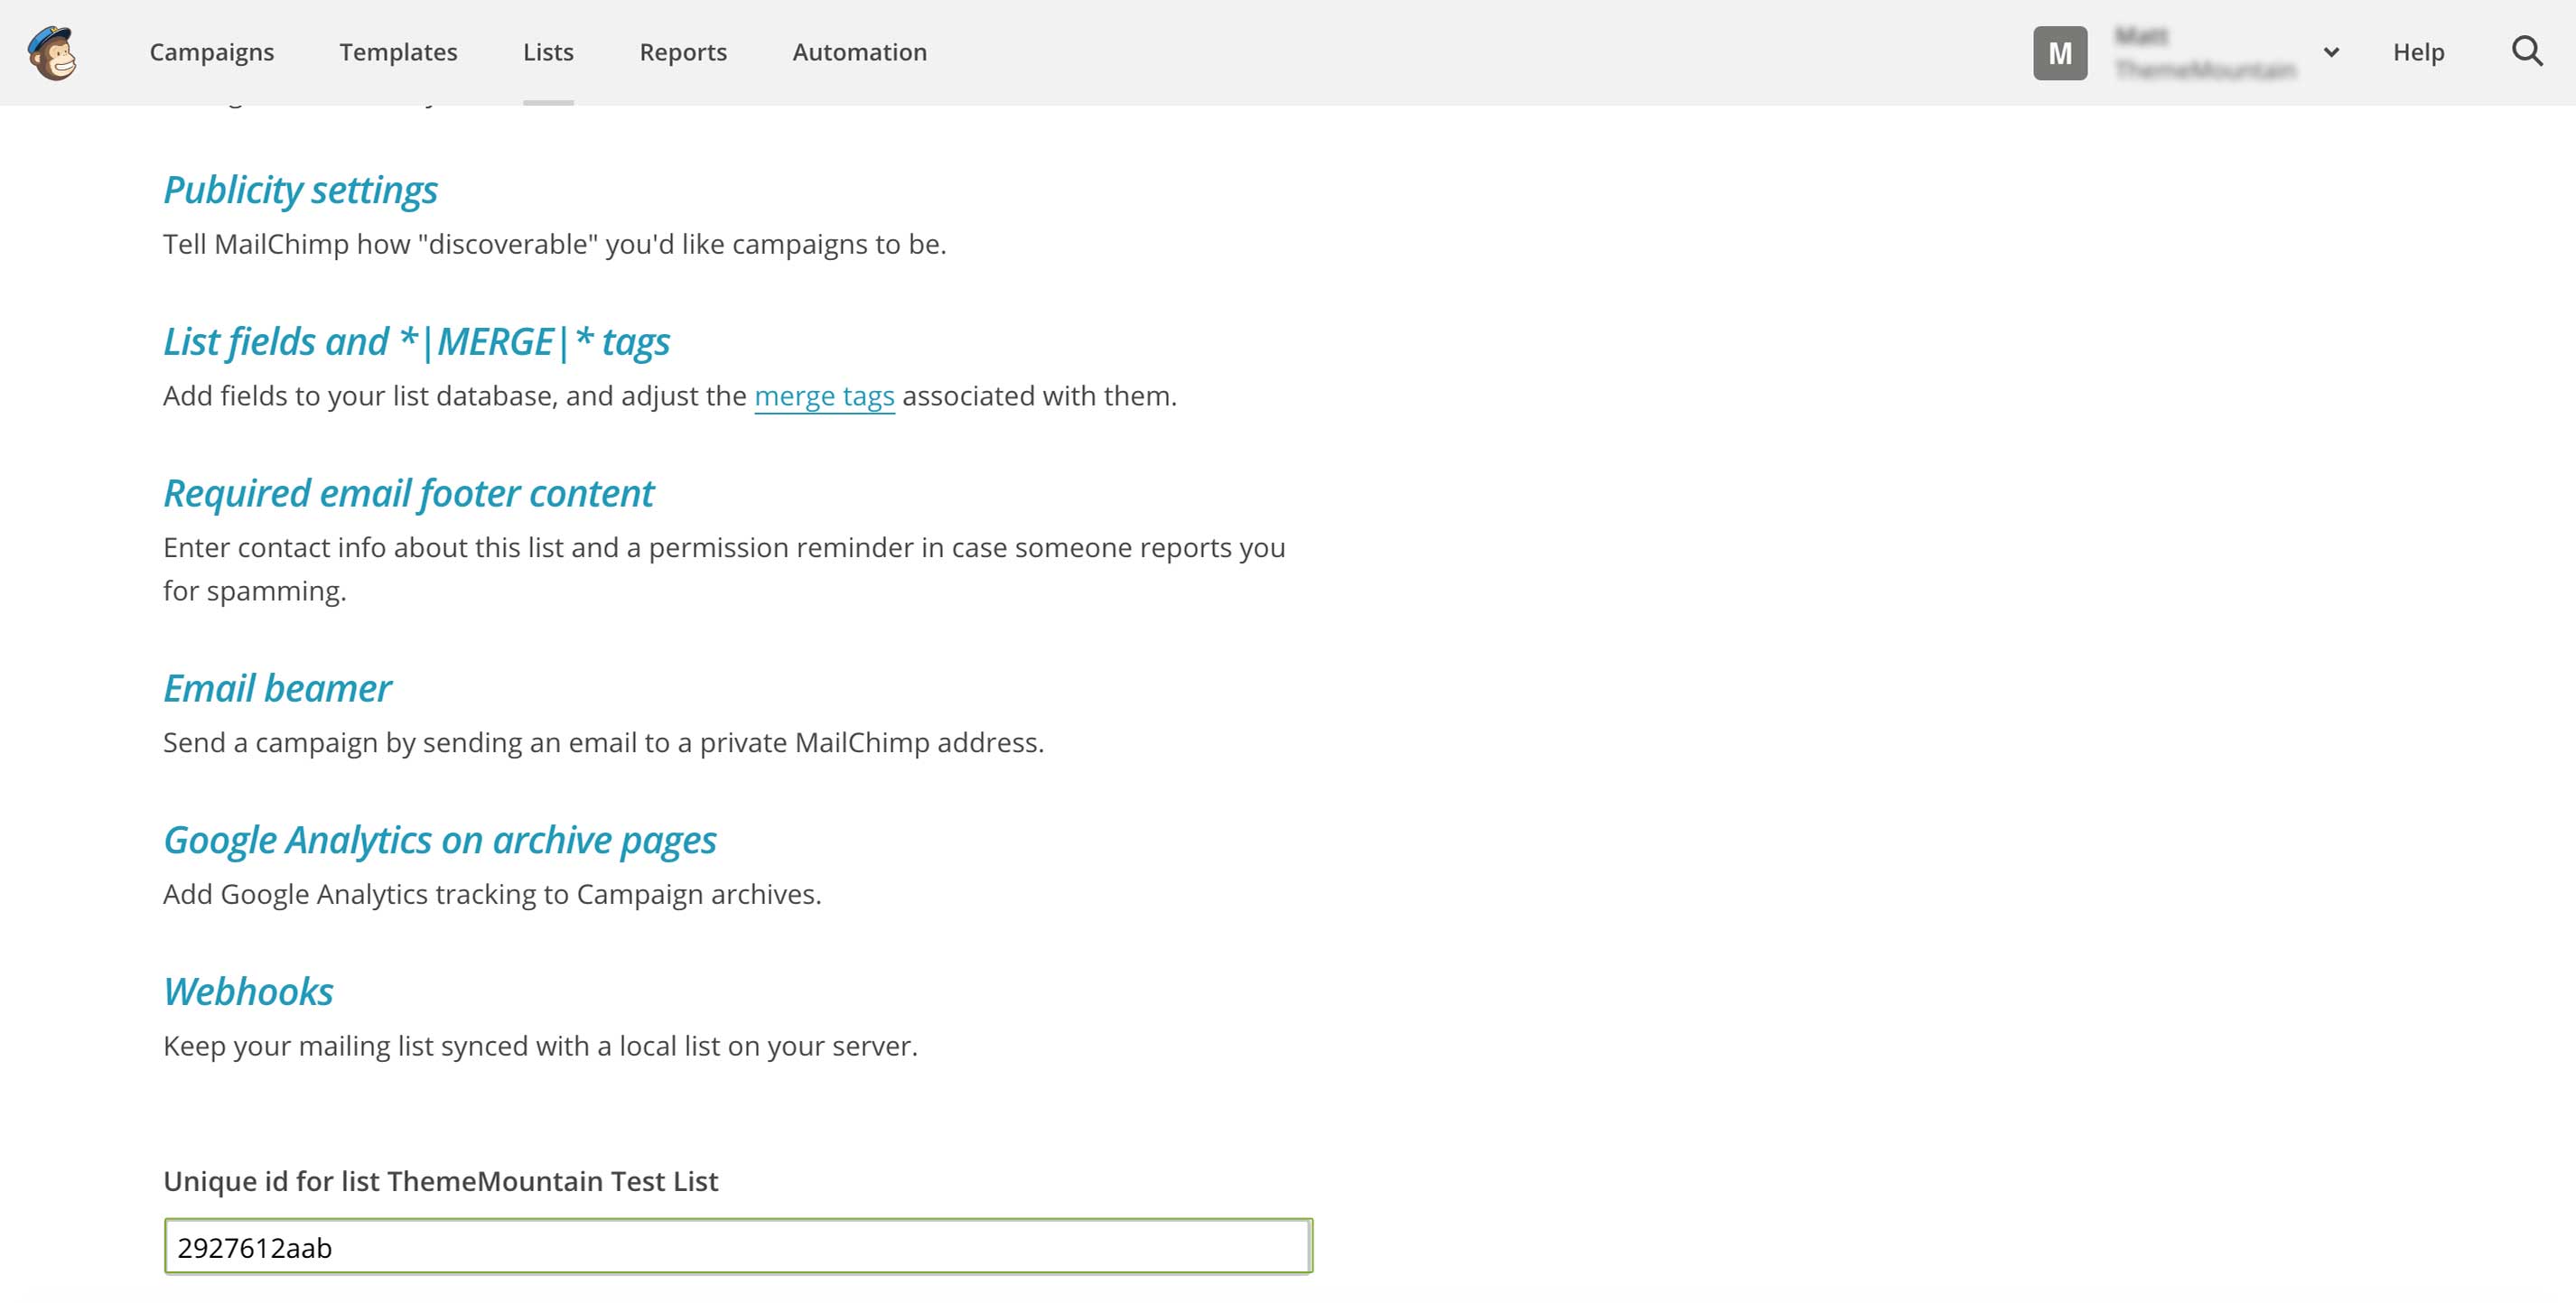
Scroll to the bottom of the Settings page and copy the list ID.
Step 5.
Paste the list id into the designated textfield in the TM Newsletter Subscribe Widget.
-
Requirements
Get Widget Code
Step 1.
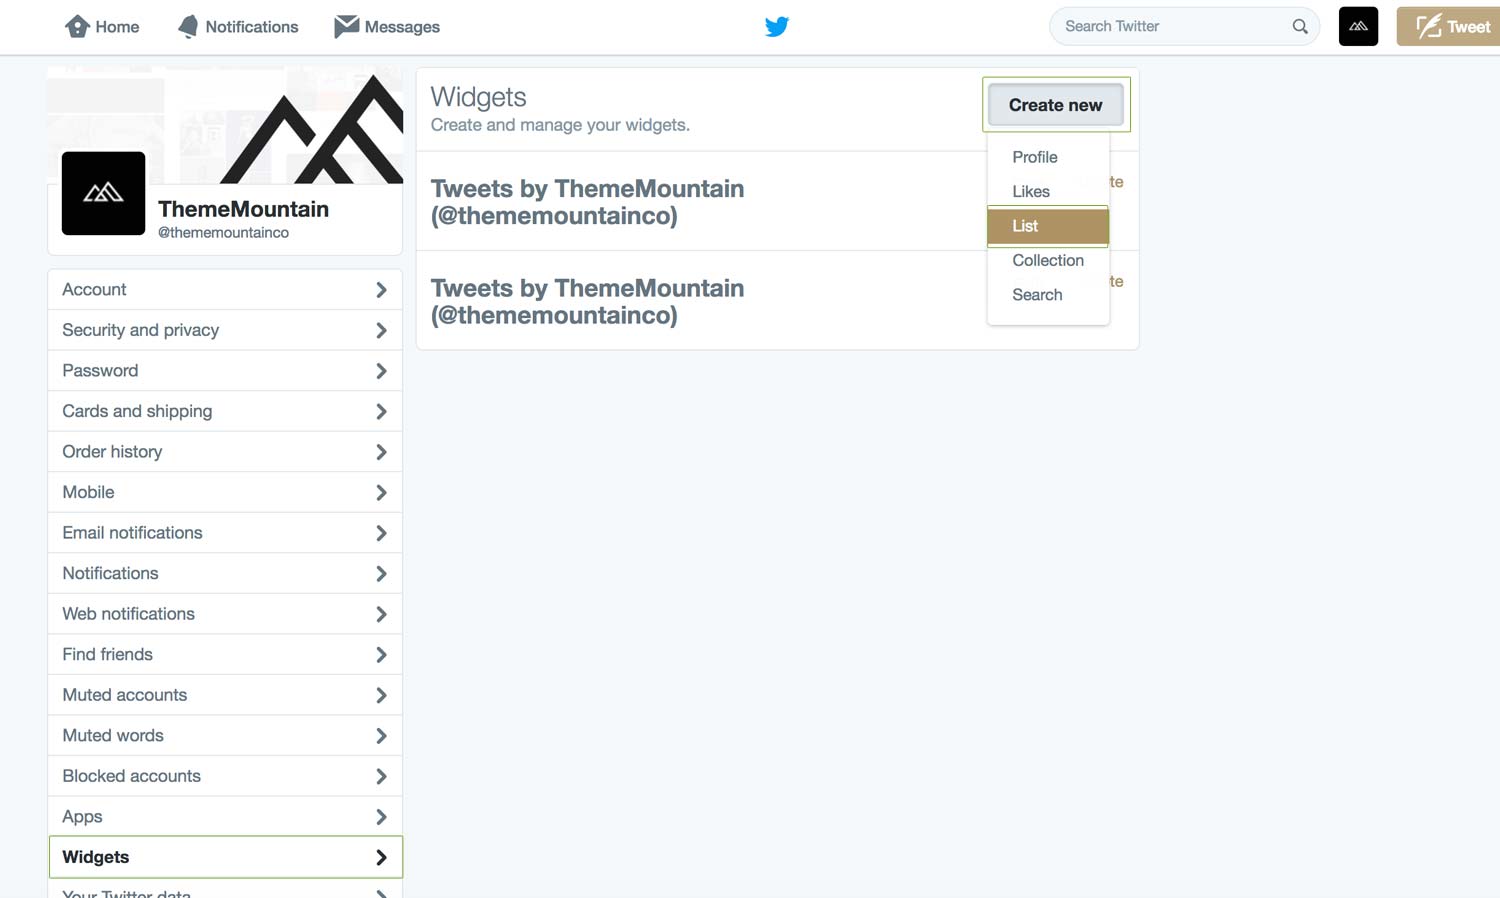
Log in to your Twitter account and go to Settings > Widgets. Then click the button "Create New" and select "List".
Step 2.
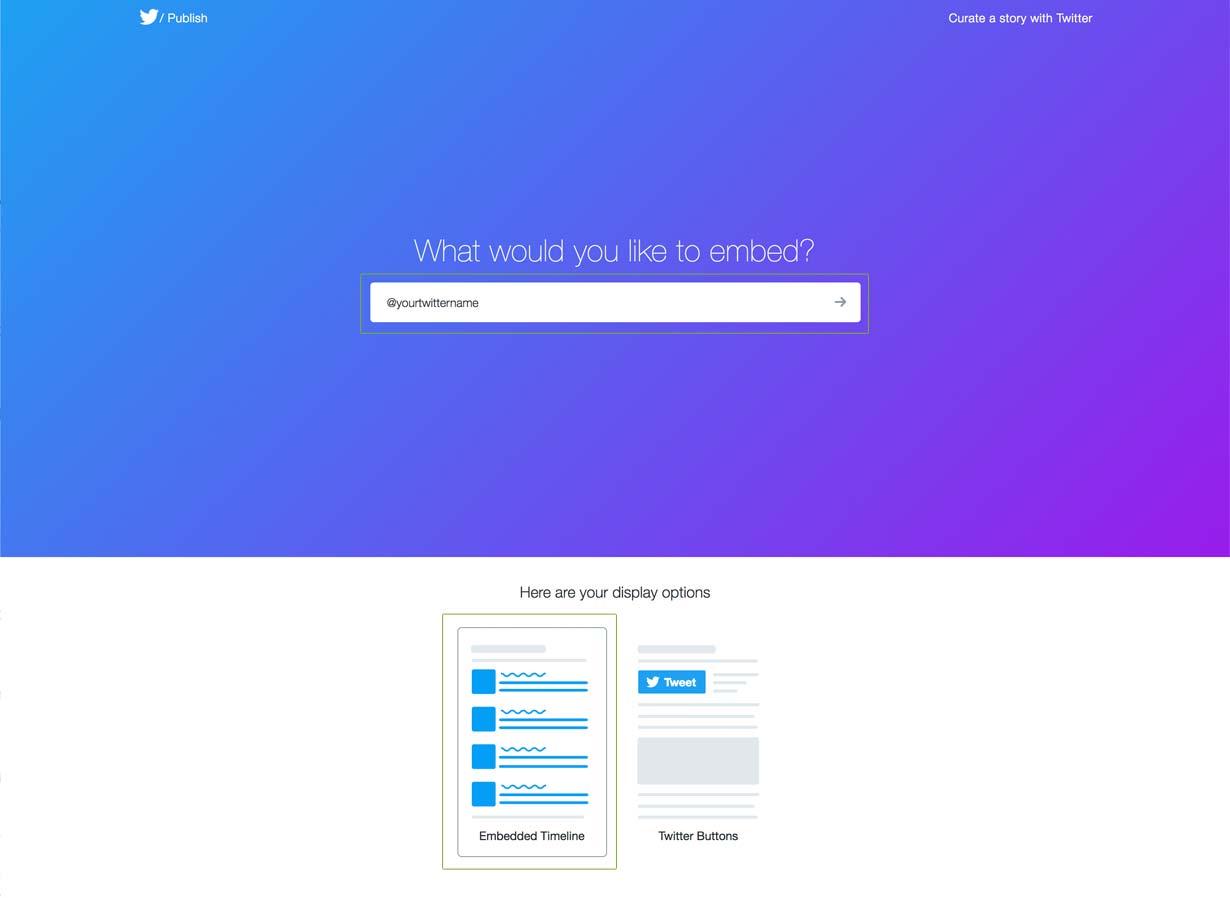
Enter your username in the designated textfield and selected "Embedded Timeline" as your diplsay option.
Step 3.
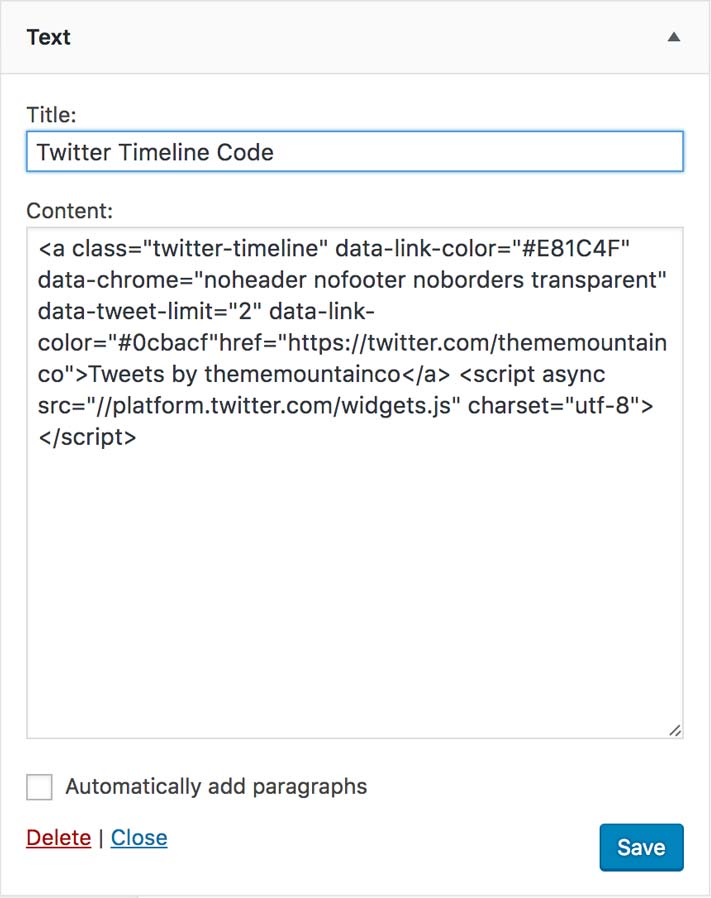
Copy the generated code by clicking the "Copy Code" button.

Example
Step 4.
Paste the code into a Text Widget area.
Customizing the Widget Look
You can customize the Twitter Timeline Widget the options mentioned below. For more detailed information please visit https://dev.twitter.com/web/embedded-timelines#customization.
Widget Theme
Change widget theme by adding the data-theme attribute to the link. Possible values: dark, for example
Example
Widget Link Color
Change the widget link color with the attribute data-link-color attribute. Values entered as HEX (#000000), for example
Example
Widget Border Color
Change the widget link color with the attribute data-border-color attribute. Values entered as HEX (#000000), for example
Example
Widget Dimensions
Change the dimensions of the widget by adding the width and/or height attributes to the link, for example
Example
Note: Minimum width is 180px and max width is 520px; minimum height is 200px.Widget Chrome Settings
Remove header, footer, borders, scrollbar and/or background color by adding the data-chrome attribute to the link. Possible values are: noheader, nofooter, noscrollbar, noborder, and transparent, for example
Example
Tweet Limit
Remove header, footer, borders, scrollbar and/or background color by adding the data-tweet-limit attribute to the link. Possible values are: noheader, nofooter, noscrollbar, noborder, and transparent, for example
Example
Can't find what you're looking for? Submit a request in our forum.